
In the last 10months I’ve gone from not knowing a thing about insulation installation to installing insulation in 6 floors, 6 sets of walls and even learnt about groundlevel insulation using recycled glass called Hasopor so I wanted to share how to install insulation or at least we’ve installed insulation in our previously uninsulated timber house.
Where should you install insulation in an old timber house?
First up, when working with an old house renovation you need to work out where you actually need to install insulation. With modern building every little gap or crack is sealed airtight as it feels like we’ve become obsessed with making new homes as airtight boxes to make them as energy efficient as possible.
With old house insulation energy efficiency is also important but old timber houses are living things that need air to move so they can breathe! Therefore where & how you install insulation is different to modern building techniques.
Where we’ve installed insulation (so far):
- All floors in the ground floor – we’ve used what’s called in Swedish as “Trossbotten” or subfloor in English, it’s basically a frame above the ground level with a subfloor containing insulation paper (more on that later) and insulation and then the original floorboards on top
- All outside facing walls – by installing insulation on the outside walls we’ve insulating ourselves from the outside cold but are allowing the warmth (eventually when we have a heat source) to move around the house. If we installed wall insulation on every wall we’d prevent the warmth in the house from circulating from room to room.
- Selected inner walls for soundproofing – on a few select inner walls we have installed (or will installed) insulation to help with soundproofing this includes the playroom so the kids can play loud & free (and these 3 are some of the loudest you’ll meet, my DNAs fault!), the downstairs bathroom as we’ll have it as a laundry room too initially and also it a little storage cupboard which will contain our water pumps.
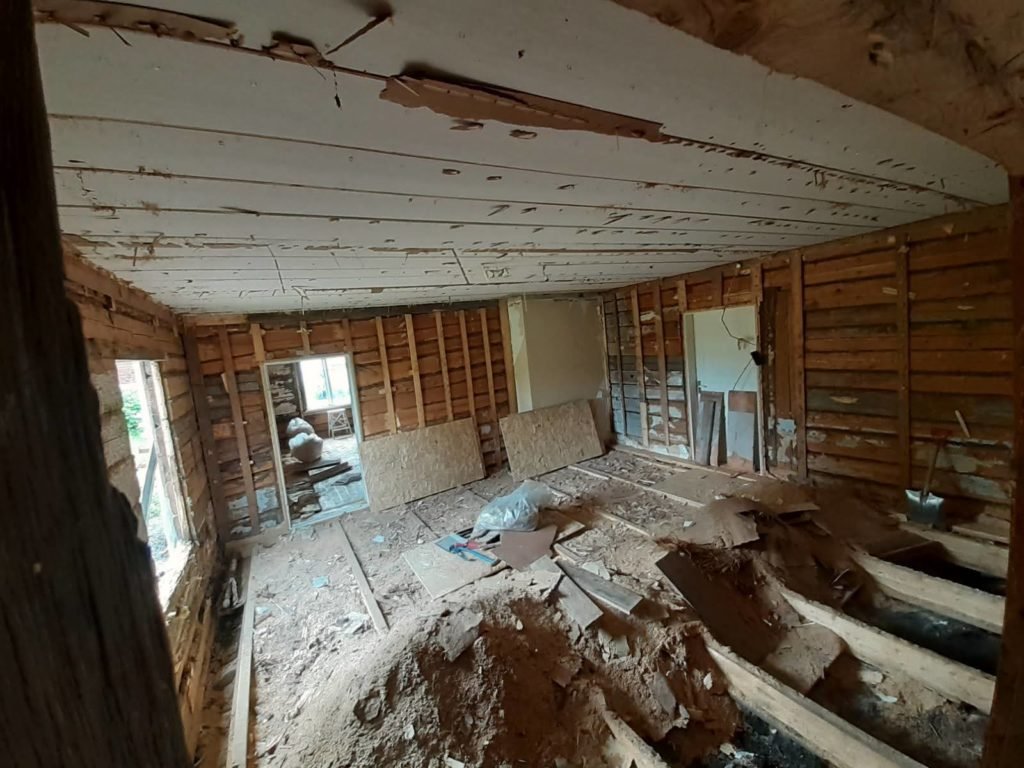
Out with the old insulation
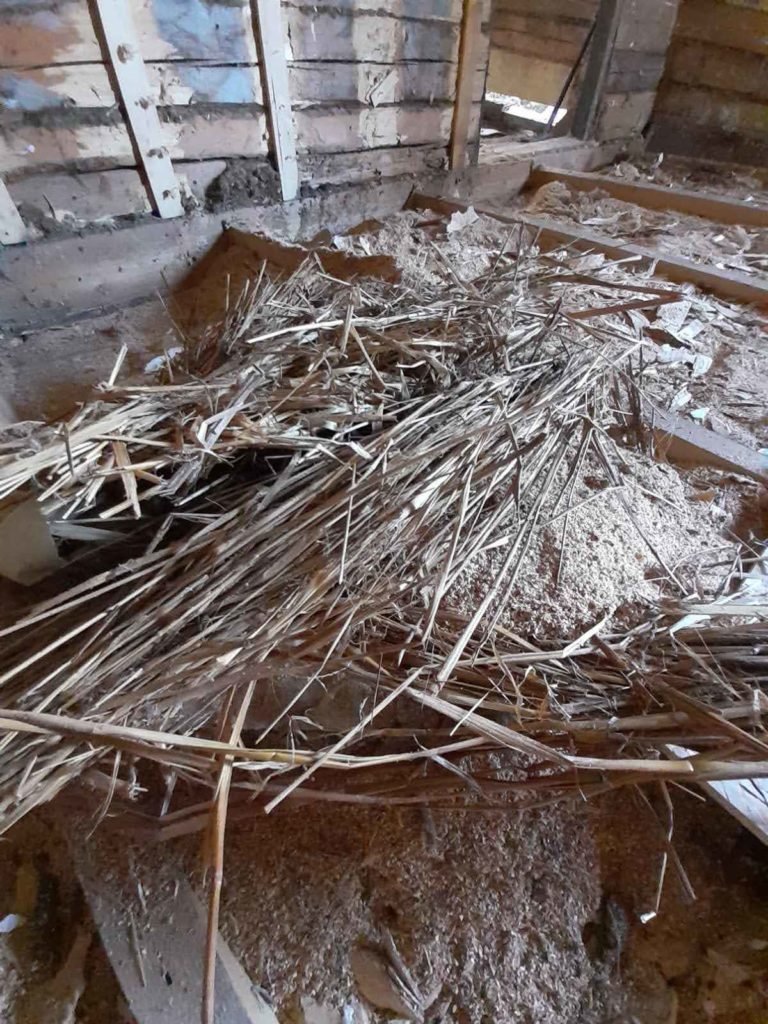
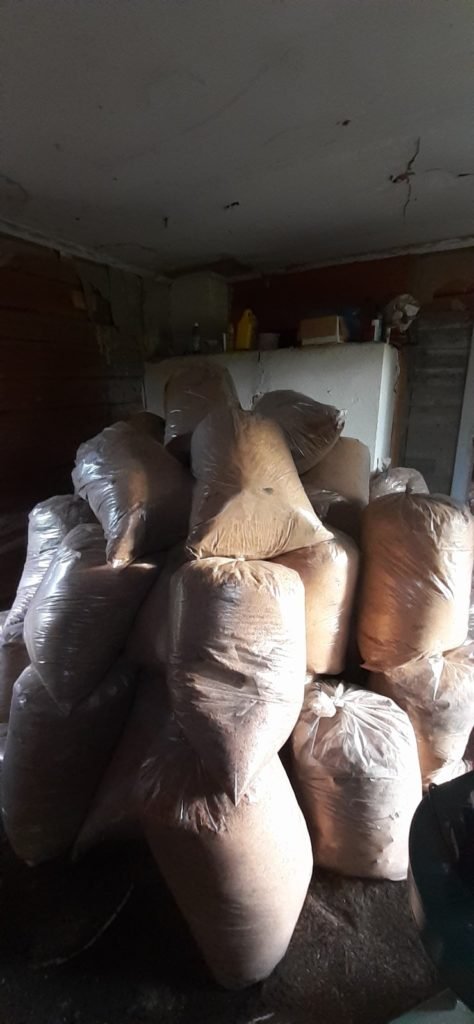
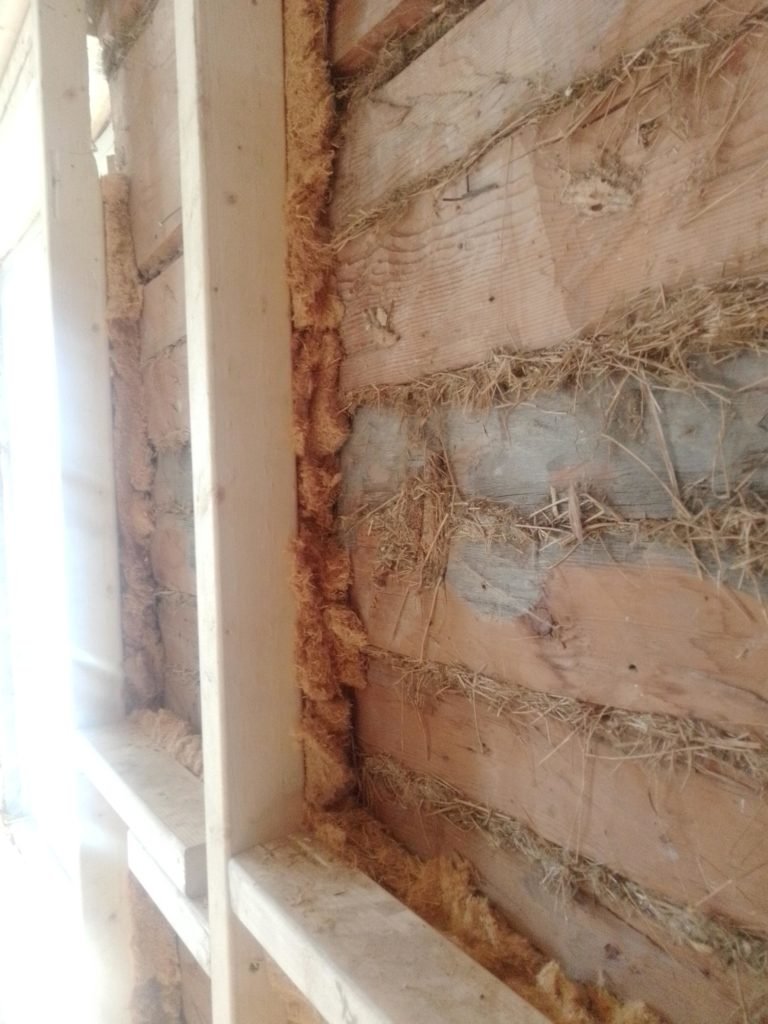
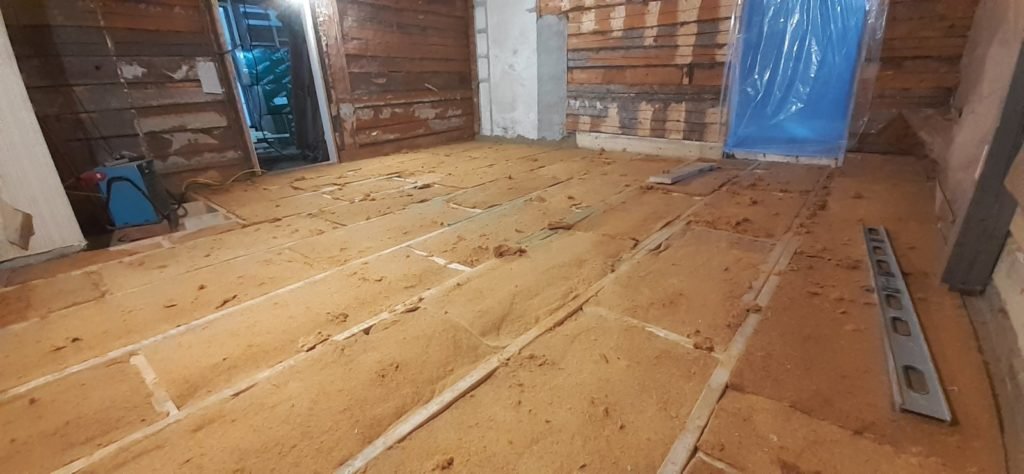
In our old house 5 of the 6 ground floor rooms were insulated with sawdust so the first part of work was taking up the floorboards and removing the old insulation which was full of dead mice and mice poop. This was pretty time consuming to bag up and throw away, definitely not the funnest job we’ve done in the house.
Insulation materials we’ve used
Insulation we used: William our timberman (he’ll be mentioned a lot on this blog, his help & guidance has been beyond!) recommended a tree fiber insulation for both floors & walls called Hunton Nativo® Wood Fiber Insulation. It’s a Norwegian eco-friendly brand and is treated with a natural fire retardant substance and not with the heavy chemicals like you get with most types of insulation, this was important to us! It comes in different sizes so we had thicker sheets for the floor & thinner for the walls.
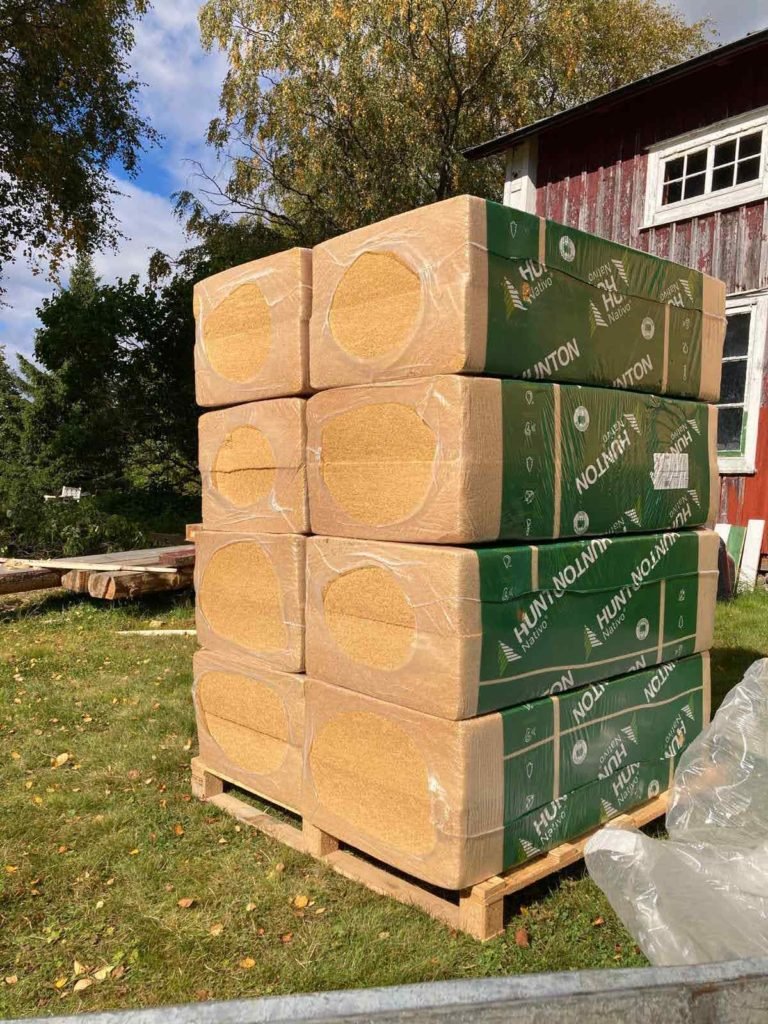
We had all the insulation needed for downstairs (& a bit more) delivered in bulk which was Williams idea. If we hadn’t I can’t imagine have much time we would have wasted travelling to pick up more even if it did literally fill the whole of the upstairs storage space while it sat waiting to be used!
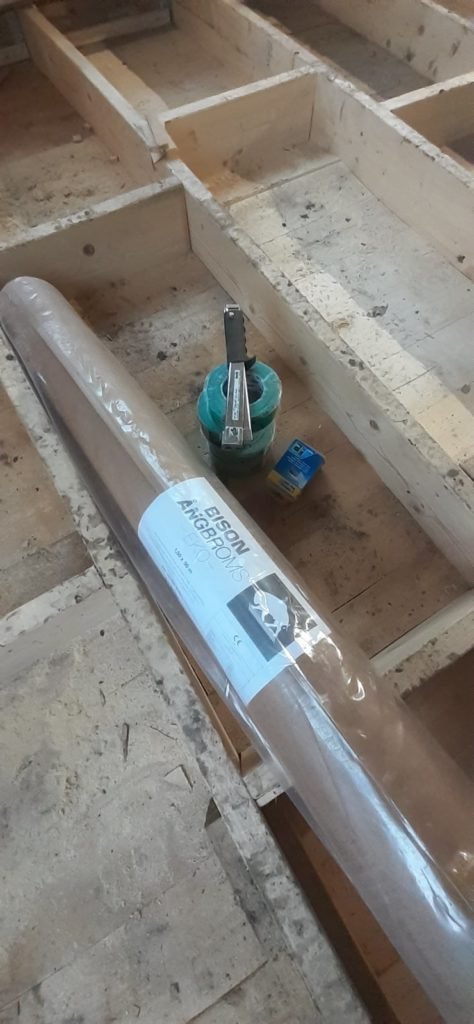
Wind paper for insulation: To stop air blowing through the floor from the ground below & as a “steam breaker” on the walls we used a thick reinforce “wind paper” called Bison Angbroms Eko. This is really nice stuff to work with and I’ll go into more detail about that below.
Tools for installing insulation
Installing insulation is actually pretty simple work, not easy but simple so you don’t normally need many expensive tools.
Here’s what tools we use to install insulation:
- FFP3 mask or half mask: protect your lungs with the dust that comes up from the insulation as you work with it, even with eco-friendly insulation there’s still dust!
- Thin working gloves with decent grip: The Huntons insulation doesn’t iche but some insulation can really irritated your skin after days of working with it. If your using gold fiber insulation this is a must, it’s pure crap!!
- A builders knife: for cutting open the packaging
- A long wood saw: I tried the special insulation saws but none worked very well so I reverted to a long wood saw. I have seen people use circular saws too but I’ve never tried it.
- A tape measure: when you build your floor or wall framing you can save a tonne of time making sure the framing is the right size of the insulation. That way you don’t need to cut the insulation. However, working in un-straight old houses there’ll always be small bits where you will need to cut insulation to fit gaps and that’s why you’ll need tape measure.
- Some scrap bits of wood: you can use these as guides when cutting insulation and also to help you push the insulation in to the floor or walls.
- Staple gun/hammer & A LOT of staples: this is for stapling the wind paper to the walls & floor framing. Highly recommend a staple hammer instead of a gun as you’ll be putting in a lot of staples.
How to install insulation in walls
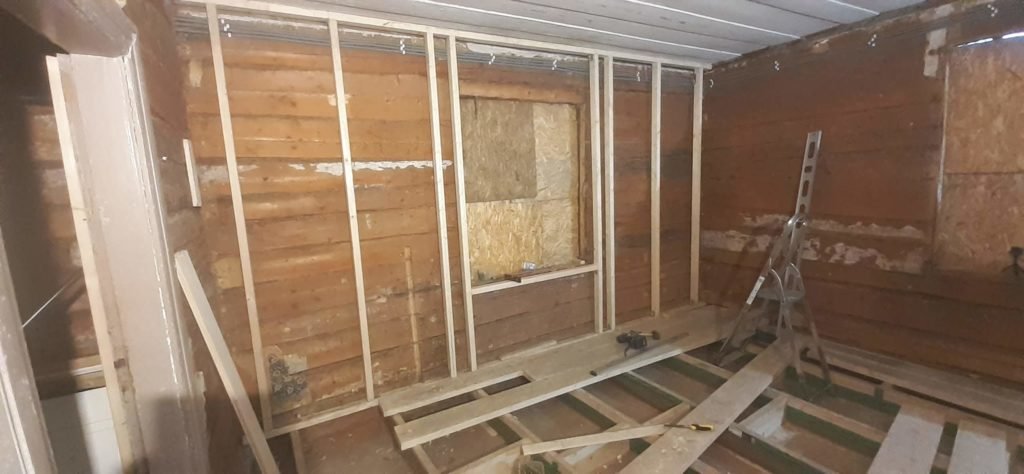
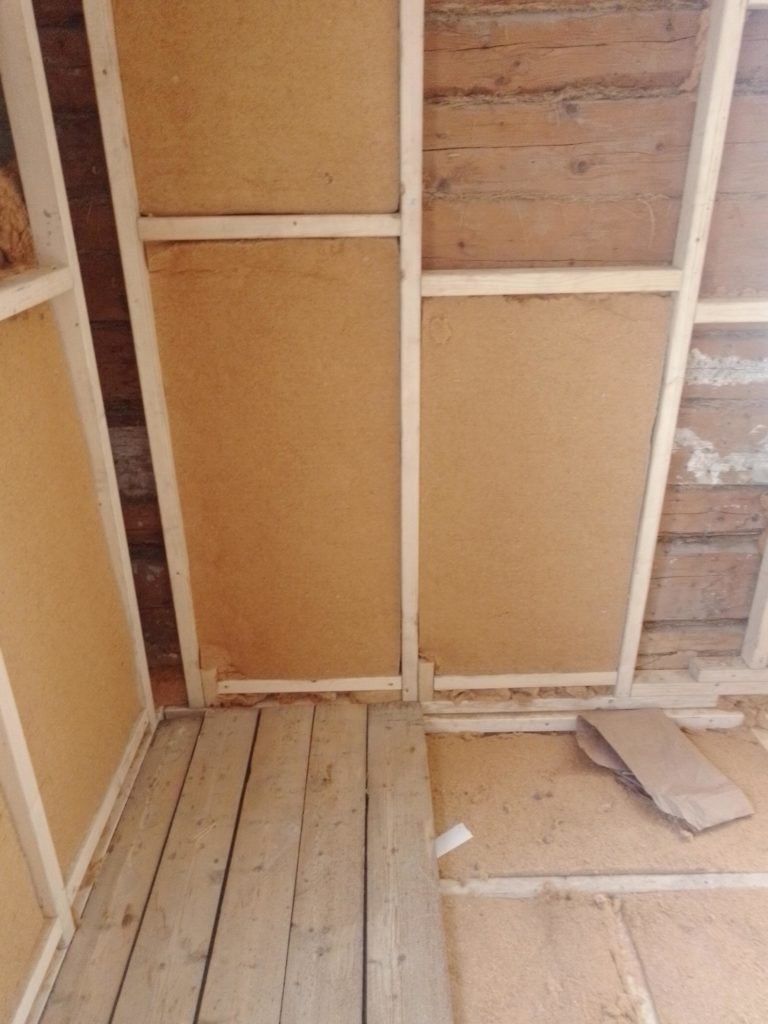
Before you install insulation in walls you obviously need wood framing which will hold the insulation against the outer walls. For us the timber structure was/is strong but in most places very unstraight so we wall framed nearly all the inner & outer walls in order to make them straight to put panel cladding up on. This framing needed to be strong enough to hold the cladding but not bullet proof.
You should wall frame with wood that is the same thickness & width as the insulation which in our case is 7cm thick by 60cm wide. Most wall framing should 60cm on centre which basically means a gap between the joists/studs of about 56cm. I made spacers from off cuts of wood to make this easier to do.
You can also strengthen the wall framing by adding noggins between the vertical studs, I found it better to cut these but not put them in place until after you have put in your insulation to save having to cut the insulation to size. Our insulation is 120cm long so that meant adding a noggin 119cm up from the floor so it fits nice and snug.
TIP: If you’re installing radiators make some you install some extra timber below the windows so you have something to screw the radiators into later on.
Before you start to push in the insulation you need to fill as small gaps between the framing & outer walls as well as in the corners, to do this just break off smaller bits of insulation and push them into the gaps.
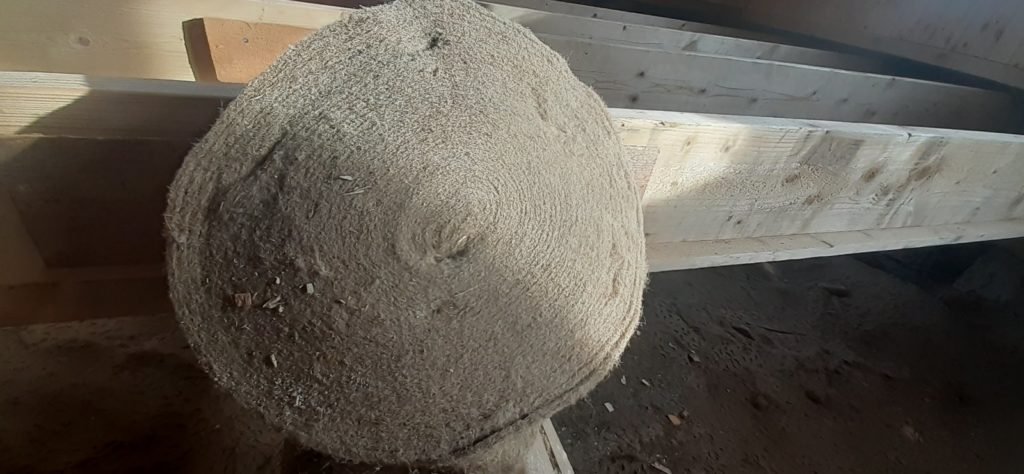
For any small gaps in the outer walls we used “lindrev” which is flax linen in English (I think), this is good stuff and it’s longer fibers make is really effective at blocking gaps in the timber. You’ll probably need a few rolls of this per room because once you start looking you’ll probably find a lot of small gaps in the timber walls.
Once the smaller areas are plugged with linen & insulation, put on your mask & gloves and you can start to push in your insulation sheets into the wall framing, providing you don’t need to cut a lot of them this part can go really fast. The insulation sheets should sit as tight to the outer walls as possible. Once the outer walls are insulated you can move on to the wind paper.
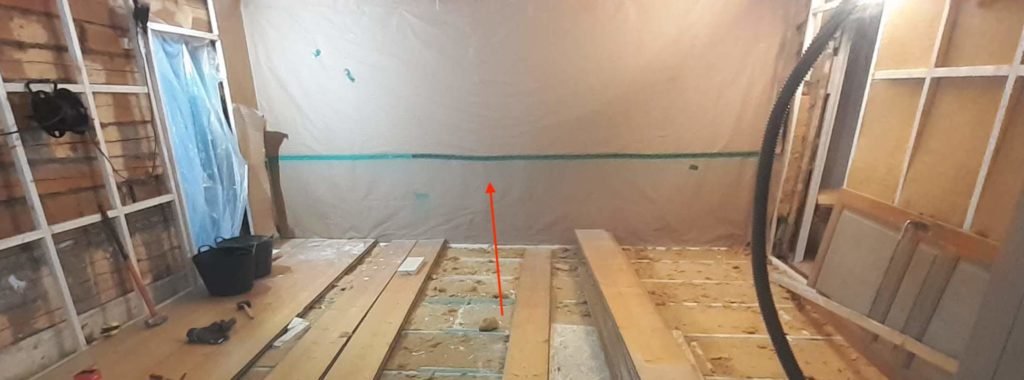
For wall insulation the wind paper acts as a “steam breaker” so moisture doesn’t build up in the walls when the cold outside air meets the warmer inside air. I still haven’t 100% got my head around the science of this but I know what needs to be done :).
For walls you put the wind paper/steam breaker on top of the insulation on the inside of the house not to be confused with modern building where you might put a plastic or something on the inside of the outside wall (before the insulation), as I’ve mentioned old houses want to breathe!!
Installing wall paper can be tricky as the sheets are very long so it’s better to be 2 people if possible although I have done the majority of walls alone. Start at the bottom and pull the windpaper out horizontally along the wall. You want it to be tight to the wall framing & not hanging down.
Hold the windpaper tight and then staple it into the wall framing and repeat this across the wall leaving a good 30-40cm overlap in the corners where you meet the inner walls. Once the bottom row is complete, get a chair and do the upper row making sure the paper goes right up tight to the ceiling as well.
With the height of our walls we ended up with an overlap of 50-60cm between the top & bottom sheets of wind paper so in most places we didn’t use tape to connect them although you can do that.
With the steam breaker in place you can put up wall cladding or panels following where you put the staples so you can find the joists/studs to nail or screw into.
I know plaster board is very popular but we have avoided it in our house because as I mentioned this old house is alive & still moves which could in theory crack plaster board and that’s why we’ve gone for wood cladding & hanging paper for our walls.
And that’s it, wall insulation installation done!
How to install insulation in floors
Again you need your floor structure in place before any insulation can be installed in the floor. Our insulation for the floor is 12cm thick to match the width of the floor joists.
It’s the same principle as the wall framing with joists being 60cm on centre with noggins between them to “stiffen” the floor & prevent it bouncing.
You also might need to support longer joists from underneath depending on the size of the room. I was taught never let a joist go more than 3 metres without supporting it from underneath. In most rooms I ran an under support joists perpendicular to the other joists as a support. It’s also quite hard to get joists over 3m long that aren’t wavey.
It would take a whole post to describe how to build a subfloor frame so I’ll go into that more in another post in the future.
A tip I learnt is it’s much faster to put the wind paper down before the noggins because you can just roll out big long strips of paper and push the noggins down on the paper afterwards, just be careful not to rip the wind paper when you do this.
For floor insulation you staple the wind paper to your subfloor boards and put the insulation on top of it to prevent wind from the ground below coming into the insulation. You need to tape the wind paper around the edges too so it’s as airtight as possible. You can also use clay instead of tape, we did this in some rooms but as winter drew in it became very hard to get the clay to dry without freezing so we had to revert to using tape instead.
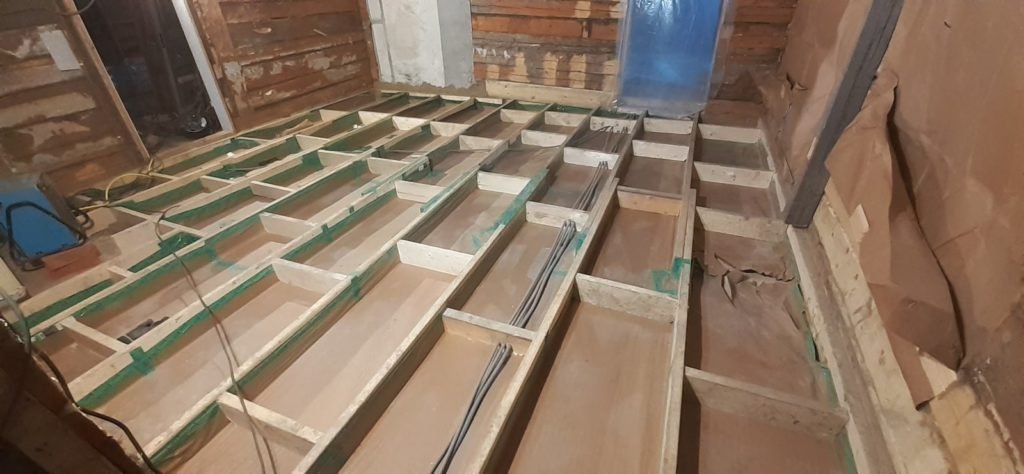
With the wind paper in place, again put on your mask & gloves and start to push your insulation into the “boxes” in the subfloor. They should be snug so you’ll find it can be quite hard work to get the thick insulation in place and this is where some lengths of scrap wood can be useful to push in the insulation.
Making your subfloor “boxes” the same width & length as the insulation saves a tonne of time but you will inevitably need to cut insulation to fit in some places. Roughly measure the box and then mark out on the insulation and cut. Keep all the small cut off bits and they can be useful for filing gaps later or in other rooms. When the insulation is down you can put you floorboards back down directly on top, make sure the floorboards sit on the joists and not the insulation itself since that’s what the joists are for!
How to cut insulation
Quick note on how to cut insulation. Our insulation sheets are very firm & rigid so while it takes a bit of work they are actually quite easy to cut. As I mentioned before I did buy a special insulation saw but I found it to be a blunt and therefore ended up just using a simple long wood handsaw instead.
When cutting insulation have a mask on as you will create a lot of dust when cutting it and most insulation does contain heavy chemicals for fire protection.
It’s good to setup a mini cutting station & have a long piece of wood or spirit level as a guide so you get straight cuts although you don’t need to be too picky as you can fill gaps later with off cuts. I normally keep a bag of small insulation off cuts which I can use to fill in any small gaps.
I’ve seen some people on YouTube using a circular saw to cut insulation and it seems to work pretty well, I prefer a simple hand saw as in a weird way I find working with insulation a bit therapeutic & calm away from the noise of power tools.
Insulation for soundproofing walls
As well as keeping your house warm you can also install insulation for soundproofing too. As I mentioned we’ve installed insulation on a few inner walls in the bathroom/laundry, electricity/water pump room and between the lounge & playroom.
It’s exactly the same approach as installing insulation on outer walls except you skip the wind paper / steam break since there shouldn’t be big difference in temperature between the inner walls which could cause moisture.
Wrapping up
So there’s a bit of an overview on how to install insulation in both walls & floors or at least how we’ve done it. We are first time DIYers but I’ve been shown a lot of this by professionals & in the last 10 months insulating walls & floors has been one of the main tasks I’ve been doing!! So to wrap up, installing insulation isn’t rocket science so why not give it go yourself!
Thanks for reading!